


Abrasives vs. Diamond Blades: Choosing the Right Tool for the Job
Selecting the correct cutting tool is essential for achieving clean results, maintaining efficiency, and managing project costs. When working with cut-off tools or power saws, the choice generally comes down to two primary options: abrasive cutting discs and diamond blades. While both serve to cut tough materials, their construction, longevity, and ideal applications differ significantly.
Understanding Abrasive Discs
Abrasive discs are manufactured from synthetic grinding grains bonded together with resin. During operation, the disc gradually wears away, constantly shedding used material to expose fresh, sharp grains. Because of this design, abrasive discs excel at cutting through various metals, including steel tubing, structural iron, and rebar. Their primary advantage lies in their low initial cost, making them a practical choice for minor repairs or occasional metalworking. However, because the disc shrinks as it wears down, operators must replace them frequently during larger tasks, and the maximum cutting depth decreases over time.
The Advantage of Diamond Blades
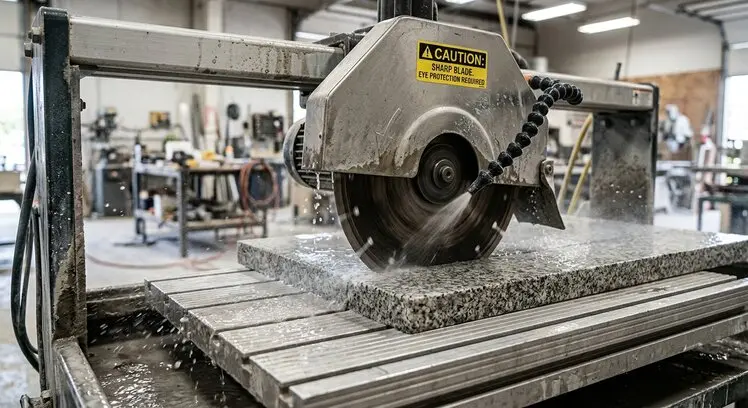
Diamond blades feature a durable steel core with industrial synthetic diamond particles embedded along the outer rim. Rather than wearing down rapidly like an abrasive disc, the steel core retains its original diameter throughout its operational life while the diamond edge grinds through material. These blades are engineered specifically for heavy masonry applications, such as concrete, brick, stone, pavers, and ceramic tile. Although diamond blades require a higher upfront investment, their long operational lifespan and consistent cutting depth make them far more cost-effective for high-volume work.
Selecting the Right Option
Determining which option to use ultimately depends on the material required for the job. For small-scale projects involving metal fabrication or pipe cutting, abrasive discs offer an economical and effective solution. Conversely, for projects requiring extensive work with concrete, tile, or masonry, investing in a diamond blade ensures cleaner cuts, higher efficiency, and greater overall value over the life of the tool.
Selecting the correct cutting tool is essential for achieving clean results, maintaining efficiency, and managing project costs. When working with cut-off tools or power saws, the choice generally comes down to two primary options: abrasive cutting discs and diamond blades. While both serve to cut tough materials, their construction, longevity, and ideal applications differ significantly.
Understanding Abrasive Discs
Abrasive discs are manufactured from synthetic grinding grains bonded together with resin. During operation, the disc gradually wears away, constantly shedding used material to expose fresh, sharp grains. Because of this design, abrasive discs excel at cutting through various metals, including steel tubing, structural iron, and rebar. Their primary advantage lies in their low initial cost, making them a practical choice for minor repairs or occasional metalworking. However, because the disc shrinks as it wears down, operators must replace them frequently during larger tasks, and the maximum cutting depth decreases over time.
The Advantage of Diamond Blades
Diamond blades feature a durable steel core with industrial synthetic diamond particles embedded along the outer rim. Rather than wearing down rapidly like an abrasive disc, the steel core retains its original diameter throughout its operational life while the diamond edge grinds through material. These blades are engineered specifically for heavy masonry applications, such as concrete, brick, stone, pavers, and ceramic tile. Although diamond blades require a higher upfront investment, their long operational lifespan and consistent cutting depth make them far more cost-effective for high-volume work.
Selecting the Right Option
Determining which option to use ultimately depends on the material required for the job. For small-scale projects involving metal fabrication or pipe cutting, abrasive discs offer an economical and effective solution. Conversely, for projects requiring extensive work with concrete, tile, or masonry, investing in a diamond blade ensures cleaner cuts, higher efficiency, and greater overall value over the life of the tool.
Setting Up a Safe and Efficient Site Power Supply
Choosing the Right Voltage and Transformers
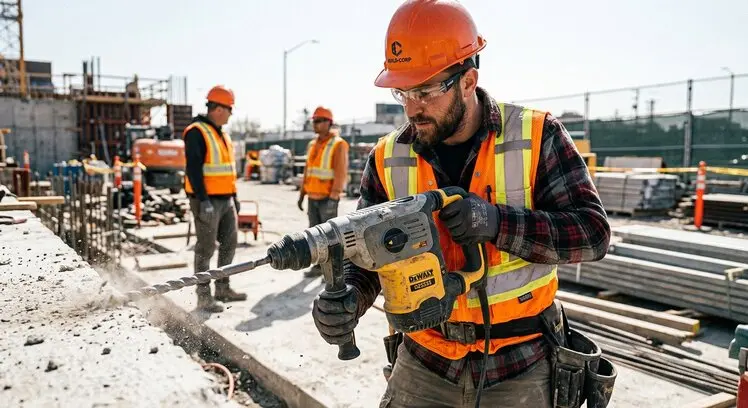
Establishing a reliable job site power supply starts with matching your transformers to the requirements of your tools and local safety standards. On construction sites, reduced low voltage systems—such as 110V step-down transformers—are standard to minimize shock hazards. When selecting a transformer, calculate the total wattage of all tools connected simultaneously to ensure the continuous rating of the transformer can comfortably handle the load without overheating or causing voltage drops that degrade tool performance.
Extension Lead Length and Cable Gauge
Using extension leads of appropriate length and conductor thickness is crucial for delivering steady electrical current. Overly long or thin cables increase electrical resistance, causing a drop in voltage that forces power tools to draw extra current, overheat, and risk motor burnout. Always choose heavy-duty leads with thick copper wire gauges suitable for high-draw equipment, and keep cable runs as direct and concise as possible to ensure maximum efficiency and tool longevity.
Proper Cable Reel Usage and Heat Dissipation
Cable reels are convenient for extending power across long distances, but they must be operated correctly to prevent electrical fires. Leaving a heavy power load running through a fully coiled cable reel creates an induction loop that traps heat, melting the rubber insulation and damaging the wiring. Always fully uncoil the entire length of the cable reel before powering on high-amperage tools, and ensure the reel is equipped with built-in thermal overload protection.
Moisture Protection and Physical Cable Care
Job site electrical connections are exposed to harsh conditions including foot traffic, sharp materials, dust, and water. Select extension leads and transformers rated with high Ingress Protection (IP) codes to shield against moisture and dust ingress, particularly during outdoor operations. Position cables away from walkways and high-traffic vehicle areas to prevent crushing, and regularly inspect plugs, outer sheathing, and socket enclosures for physical wear before plugging in any equipment.
Choosing the Right Voltage and Transformers
Establishing a reliable job site power supply starts with matching your transformers to the requirements of your tools and local safety standards. On construction sites, reduced low voltage systems—such as 110V step-down transformers—are standard to minimize shock hazards. When selecting a transformer, calculate the total wattage of all tools connected simultaneously to ensure the continuous rating of the transformer can comfortably handle the load without overheating or causing voltage drops that degrade tool performance.
Extension Lead Length and Cable Gauge
Using extension leads of appropriate length and conductor thickness is crucial for delivering steady electrical current. Overly long or thin cables increase electrical resistance, causing a drop in voltage that forces power tools to draw extra current, overheat, and risk motor burnout. Always choose heavy-duty leads with thick copper wire gauges suitable for high-draw equipment, and keep cable runs as direct and concise as possible to ensure maximum efficiency and tool longevity.
Proper Cable Reel Usage and Heat Dissipation
Cable reels are convenient for extending power across long distances, but they must be operated correctly to prevent electrical fires. Leaving a heavy power load running through a fully coiled cable reel creates an induction loop that traps heat, melting the rubber insulation and damaging the wiring. Always fully uncoil the entire length of the cable reel before powering on high-amperage tools, and ensure the reel is equipped with built-in thermal overload protection.
Moisture Protection and Physical Cable Care
Job site electrical connections are exposed to harsh conditions including foot traffic, sharp materials, dust, and water. Select extension leads and transformers rated with high Ingress Protection (IP) codes to shield against moisture and dust ingress, particularly during outdoor operations. Position cables away from walkways and high-traffic vehicle areas to prevent crushing, and regularly inspect plugs, outer sheathing, and socket enclosures for physical wear before plugging in any equipment.
VC Materials Delivery Service: Areas, Pricing, and Lead Times
Getting building materials to your job site on time and on budget is the lifeblood of any successful construction project. Delays in delivery can stall work, throw off trades schedules, and quickly inflate project costs.
To help you plan your next project smoothly, here is a complete guide to our delivery service coverage area, pricing structure, and expected lead times.
Service Areas: Where We Deliver
Our delivery network is designed to cover both urban construction zones and surrounding regional sites with high reliability. Our local delivery zone encompasses the entire primary metro area and immediate suburban developments, ensuring fast, daily turnaround times for core trades.
For projects located outside the main urban core, our extended service zone reaches up to 50 miles out to support rural builds, housing developments, and remote commercial job sites. If your site is located beyond our standard extended zone, custom long-haul transport can be arranged depending on order volume and site access requirements.
Delivery Pricing: How Costs Are Calculated
We believe in straightforward, transparent delivery fees so you can accurately estimate your project overhead from day one. Orders fulfilled within our local zone qualify for a flat-rate delivery fee, making routine restocking affordable for small-to-medium contracts.
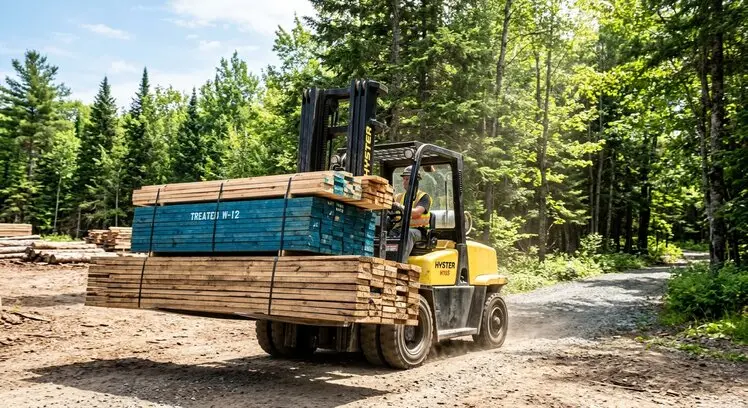
For deliveries in our extended service zone, rates are calculated using a baseline fee plus a per-mile charge based on the exact distance to your site. Large bulk deliveries—such as full truckloads of lumber, masonry, or steel framing—may involve heavy-haul equipment surcharges or offloading fees if specialized machinery like a boom truck or forklift is required on site.
Expected Lead Times: Planning Your Deliveries
Timing is everything on a construction site, which is why we offer tiered delivery schedules tailored to your material needs. Standard in-stock building materials, such as framing lumber, drywall, and general fasteners, typically carry a 24- to 48-hour lead time for local deliveries.
Specialty items, custom-cut materials, or direct-from-manufacturer orders require additional lead time, generally ranging from five to ten business days depending on supplier availability. To guarantee smooth progress, we always recommend placing orders for critical path materials well in advance of your crew arriving on site.
Preparing Your Site for a Smooth Drop-Off
Even the most punctual delivery can hit a wall if your job site isn't ready for the truck to arrive. Prior to scheduled drop-offs, clear a wide, level staging area free of overhead power lines, low-hanging branches, and parked worker vehicles.
Make sure clear site entrance instructions are provided when placing your order, especially for restricted-access or high-traffic areas. Having a designated point person available on site during the delivery window ensures materials are safely placed exactly where you need them, keeping your project moving forward without a hitch.
Getting building materials to your job site on time and on budget is the lifeblood of any successful construction project. Delays in delivery can stall work, throw off trades schedules, and quickly inflate project costs.
To help you plan your next project smoothly, here is a complete guide to our delivery service coverage area, pricing structure, and expected lead times.
Service Areas: Where We Deliver
Our delivery network is designed to cover both urban construction zones and surrounding regional sites with high reliability. Our local delivery zone encompasses the entire primary metro area and immediate suburban developments, ensuring fast, daily turnaround times for core trades.
For projects located outside the main urban core, our extended service zone reaches up to 50 miles out to support rural builds, housing developments, and remote commercial job sites. If your site is located beyond our standard extended zone, custom long-haul transport can be arranged depending on order volume and site access requirements.
Delivery Pricing: How Costs Are Calculated
We believe in straightforward, transparent delivery fees so you can accurately estimate your project overhead from day one. Orders fulfilled within our local zone qualify for a flat-rate delivery fee, making routine restocking affordable for small-to-medium contracts.
For deliveries in our extended service zone, rates are calculated using a baseline fee plus a per-mile charge based on the exact distance to your site. Large bulk deliveries—such as full truckloads of lumber, masonry, or steel framing—may involve heavy-haul equipment surcharges or offloading fees if specialized machinery like a boom truck or forklift is required on site.
Expected Lead Times: Planning Your Deliveries
Timing is everything on a construction site, which is why we offer tiered delivery schedules tailored to your material needs. Standard in-stock building materials, such as framing lumber, drywall, and general fasteners, typically carry a 24- to 48-hour lead time for local deliveries.
Specialty items, custom-cut materials, or direct-from-manufacturer orders require additional lead time, generally ranging from five to ten business days depending on supplier availability. To guarantee smooth progress, we always recommend placing orders for critical path materials well in advance of your crew arriving on site.
Preparing Your Site for a Smooth Drop-Off
Even the most punctual delivery can hit a wall if your job site isn't ready for the truck to arrive. Prior to scheduled drop-offs, clear a wide, level staging area free of overhead power lines, low-hanging branches, and parked worker vehicles.
Make sure clear site entrance instructions are provided when placing your order, especially for restricted-access or high-traffic areas. Having a designated point person available on site during the delivery window ensures materials are safely placed exactly where you need them, keeping your project moving forward without a hitch.
How To Find The Correct Solution
Material Selection and Bond Hardness
Selecting the right diamond blade begins with matching the hardness of the bond to the material you plan to cut. Diamond blades do not actually cut material; instead, they grind it away using synthetic diamond particles exposed along the rim. Hard materials like porcelain, granite, or cured concrete require a soft-bonded blade so that the metal matrix wears away at a rate that continually exposes fresh, sharp diamond particles. Conversely, highly abrasive materials such as asphalt or fresh concrete require a hard-bonded blade to prevent the metal from eroding too quickly and wasting the diamonds prematurely.
Understanding Rim Configurations
The design of the blade's rim directly influences both the speed of the cut and the smoothness of the finished edge. Segmented rims feature small gaps called gullets that help dissipate heat and flush out dust, making them the fastest option for rough cuts in concrete and brick. Continuous rims lack these gaps and are designed specifically for delicate materials like ceramic tile and glass, where clean, chip-free edges are essential. Turbo rims offer a middle ground, using a continuous edge with serrated ridges to deliver faster cutting speeds while still maintaining a relatively smooth finish.
Wet versus Dry Cutting Considerations
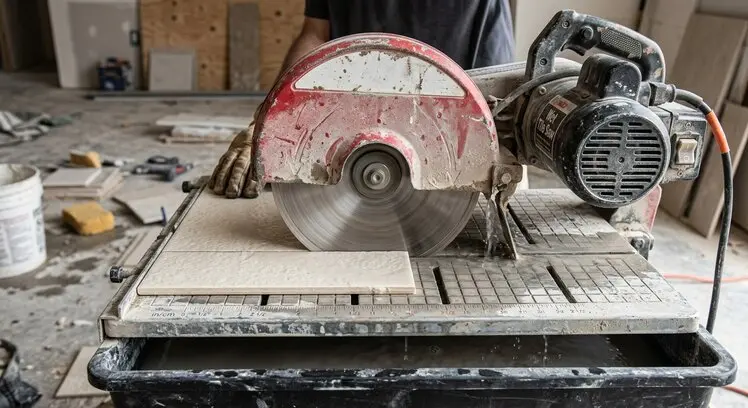
Deciding between wet and dry cutting depends on your workspace, tool type, and the material being cut. Wet cutting uses a continuous flow of water to keep the blade cool, lubricate the cut, and effectively control toxic silica dust, which significantly prolongs the overall life of the blade. Dry cutting is designed for quick, short passes where water access is unavailable or inconvenient. While dry-cutting blades can handle short cuts without liquid coolant, using them continuously without letting the blade cool down periodically can cause the steel core to warp or fail.
Power Tool Compatibility and Safety Limits
Every diamond blade must be properly matched to the physical specifications and operational limits of your power tool. The diameter of the blade and its center arbor hole must fit your saw precisely to avoid dangerous vibration or misalignment during operation. Furthermore, you must verify that the blade's maximum rated revolutions per minute (RPM) meets or exceeds the maximum operating speed of the saw itself. Exceeding a blade's recommended RPM rating can lead to blade fracture, uneven wear, or severe safety hazards on the job site.
Material Selection and Bond Hardness
Selecting the right diamond blade begins with matching the hardness of the bond to the material you plan to cut. Diamond blades do not actually cut material; instead, they grind it away using synthetic diamond particles exposed along the rim. Hard materials like porcelain, granite, or cured concrete require a soft-bonded blade so that the metal matrix wears away at a rate that continually exposes fresh, sharp diamond particles. Conversely, highly abrasive materials such as asphalt or fresh concrete require a hard-bonded blade to prevent the metal from eroding too quickly and wasting the diamonds prematurely.
Understanding Rim Configurations
The design of the blade's rim directly influences both the speed of the cut and the smoothness of the finished edge. Segmented rims feature small gaps called gullets that help dissipate heat and flush out dust, making them the fastest option for rough cuts in concrete and brick. Continuous rims lack these gaps and are designed specifically for delicate materials like ceramic tile and glass, where clean, chip-free edges are essential. Turbo rims offer a middle ground, using a continuous edge with serrated ridges to deliver faster cutting speeds while still maintaining a relatively smooth finish.
Wet versus Dry Cutting Considerations
Deciding between wet and dry cutting depends on your workspace, tool type, and the material being cut. Wet cutting uses a continuous flow of water to keep the blade cool, lubricate the cut, and effectively control toxic silica dust, which significantly prolongs the overall life of the blade. Dry cutting is designed for quick, short passes where water access is unavailable or inconvenient. While dry-cutting blades can handle short cuts without liquid coolant, using them continuously without letting the blade cool down periodically can cause the steel core to warp or fail.
Power Tool Compatibility and Safety Limits
Every diamond blade must be properly matched to the physical specifications and operational limits of your power tool. The diameter of the blade and its center arbor hole must fit your saw precisely to avoid dangerous vibration or misalignment during operation. Furthermore, you must verify that the blade's maximum rated revolutions per minute (RPM) meets or exceeds the maximum operating speed of the saw itself. Exceeding a blade's recommended RPM rating can lead to blade fracture, uneven wear, or severe safety hazards on the job site.
Essential PPE Checklist for Small Building Sites
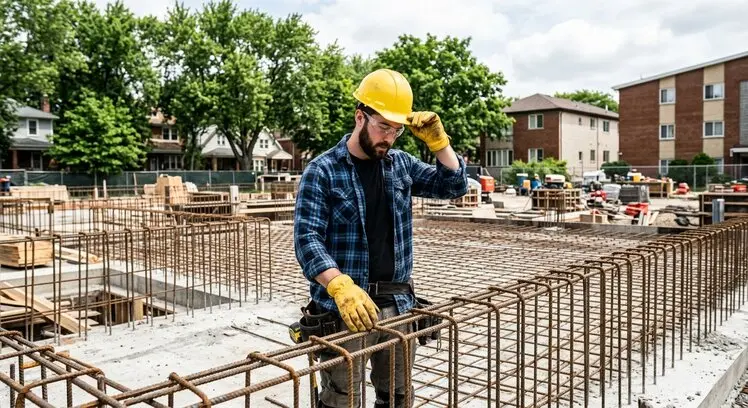
Running a small job site means keeping your team productive, on schedule, and—above all—safe. Unlike large commercial sites with dedicated safety officers, small contractors often have to wear multiple hats, including site safety manager. Having a well-stocked inventory of Personal Protective Equipment (PPE) isn't just about compliance; it’s about making sure everyone goes home healthy at the end of the day.
Here is your straightforward checklist of essential gear every small contractor should keep on site.
Hand Protection: Gloves for Every Task
Your hands are your primary tools, making them the most exposed to cuts, chemical burns, and impact injuries. Because a single pair of standard gloves won't cover every trade task, keeping a varied inventory on hand is critical. Heavy-duty leather or work gloves are essential for handling rough lumber, rebar, masonry, and heavy materials to prevent splinters, abrasions, and cuts. For sharper materials like sheet metal, glass, or when using utility knives, crew members need dedicated cut-resistant gloves. When mixing concrete, applying sealants, or working with solvents and adhesives, chemical-resistant nitrile gloves are mandatory to prevent chemical burns and skin irritation. Finally, don't forget insulated, cold-weather gloves to keep hands warm and functional during winter or outdoor projects.
Eye & Face Protection: Keeping Your Vision Clear
Flying debris, wood dust, spark splatters, and chemical splashes can cause permanent damage in a fraction of a second. Standard ANSI-approved safety glasses are the baseline requirement for any active site, so keep plenty of clear lenses for indoor work and tinted options for bright outdoor daylight. When tasks involve high-dust environments like drywall sanding or concrete grinding, crew members should switch to direct-vent or sealed safety goggles to block micro-particles. For high-powered tools, angle grinders, or heavy demolition work, full-face shields must be worn directly over safety glasses to protect the entire face from high-velocity flying fragments.
Respiratory Protection: Protecting Your Lungs
Inhaling fine dust, crystalline silica, or toxic fumes can lead to serious long-term respiratory issues, which means a generic dust mask won't fit every job. Disposable N95 or FFP2 dust masks work fine for basic, non-toxic dust protection during light sweep-ups or wood sanding. However, cutting concrete, brick, tile, or masonry releases dangerous silica dust, requiring half-mask reusable respirators equipped with proper P3 or P100 filters. For tasks involving paint spraying, heavy solvents, or working with strong epoxy resins, make sure to stock chemical vapor cartridge attachments that clip right into those reusable masks.
Head & Hearing Protection: Standard Defense
Head and ear injuries can be sudden and debilitating, so proper overhead and noise defense should be non-negotiable from day one. Type 1 hard hats protect against top-of-head impacts from falling objects or low overhead clearances, so always keep extra unexpired units on site. For hearing defense, lightweight foam or flanged earplugs are easy to stock in bulk for routine noise from power saws, hammers, and general machinery. For operators running prolonged high-decibel equipment like jackhammers or heavy saws, keep heavy-duty cap-mounted or over-head earmuffs available to prevent permanent hearing loss.
Footwear & High-Visibility Clothing
Being seen and staying firmly grounded prevents the majority of common slip, trip, and crush accidents on a busy site. Steel-toe or composite-toe work boots with puncture-resistant soles and strong ankle support are necessary to protect against falling heavy items and exposed nails. To ensure workers are easily spotted by equipment operators, delivery drivers, and passing traffic, every site should supply Class 2 or Class 3 high-visibility vests or jackets. When the weather turns, weather-appropriate high-vis rain gear keeps workers completely dry without compromising their visibility or safety standards.
Keeping Your Site Ready
Having PPE on site is only half the battle—it needs to be accessible and well-maintained. Set up a central, dry safety station on your job site loaded with extra glasses, earplugs, gloves, and mask replacements. Take time to regularly inspect equipment for wear and tear, and replace damaged gear immediately. Investing in good, readily available PPE is always cheaper than a trip to the emergency room or lost project days.
Running a small job site means keeping your team productive, on schedule, and—above all—safe. Unlike large commercial sites with dedicated safety officers, small contractors often have to wear multiple hats, including site safety manager. Having a well-stocked inventory of Personal Protective Equipment (PPE) isn't just about compliance; it’s about making sure everyone goes home healthy at the end of the day.
Here is your straightforward checklist of essential gear every small contractor should keep on site.
Hand Protection: Gloves for Every Task
Your hands are your primary tools, making them the most exposed to cuts, chemical burns, and impact injuries. Because a single pair of standard gloves won't cover every trade task, keeping a varied inventory on hand is critical. Heavy-duty leather or work gloves are essential for handling rough lumber, rebar, masonry, and heavy materials to prevent splinters, abrasions, and cuts. For sharper materials like sheet metal, glass, or when using utility knives, crew members need dedicated cut-resistant gloves. When mixing concrete, applying sealants, or working with solvents and adhesives, chemical-resistant nitrile gloves are mandatory to prevent chemical burns and skin irritation. Finally, don't forget insulated, cold-weather gloves to keep hands warm and functional during winter or outdoor projects.
Eye & Face Protection: Keeping Your Vision Clear
Flying debris, wood dust, spark splatters, and chemical splashes can cause permanent damage in a fraction of a second. Standard ANSI-approved safety glasses are the baseline requirement for any active site, so keep plenty of clear lenses for indoor work and tinted options for bright outdoor daylight. When tasks involve high-dust environments like drywall sanding or concrete grinding, crew members should switch to direct-vent or sealed safety goggles to block micro-particles. For high-powered tools, angle grinders, or heavy demolition work, full-face shields must be worn directly over safety glasses to protect the entire face from high-velocity flying fragments.
Respiratory Protection: Protecting Your Lungs
Inhaling fine dust, crystalline silica, or toxic fumes can lead to serious long-term respiratory issues, which means a generic dust mask won't fit every job. Disposable N95 or FFP2 dust masks work fine for basic, non-toxic dust protection during light sweep-ups or wood sanding. However, cutting concrete, brick, tile, or masonry releases dangerous silica dust, requiring half-mask reusable respirators equipped with proper P3 or P100 filters. For tasks involving paint spraying, heavy solvents, or working with strong epoxy resins, make sure to stock chemical vapor cartridge attachments that clip right into those reusable masks.
Head & Hearing Protection: Standard Defense
Head and ear injuries can be sudden and debilitating, so proper overhead and noise defense should be non-negotiable from day one. Type 1 hard hats protect against top-of-head impacts from falling objects or low overhead clearances, so always keep extra unexpired units on site. For hearing defense, lightweight foam or flanged earplugs are easy to stock in bulk for routine noise from power saws, hammers, and general machinery. For operators running prolonged high-decibel equipment like jackhammers or heavy saws, keep heavy-duty cap-mounted or over-head earmuffs available to prevent permanent hearing loss.
Footwear & High-Visibility Clothing
Being seen and staying firmly grounded prevents the majority of common slip, trip, and crush accidents on a busy site. Steel-toe or composite-toe work boots with puncture-resistant soles and strong ankle support are necessary to protect against falling heavy items and exposed nails. To ensure workers are easily spotted by equipment operators, delivery drivers, and passing traffic, every site should supply Class 2 or Class 3 high-visibility vests or jackets. When the weather turns, weather-appropriate high-vis rain gear keeps workers completely dry without compromising their visibility or safety standards.
Keeping Your Site Ready
Having PPE on site is only half the battle—it needs to be accessible and well-maintained. Set up a central, dry safety station on your job site loaded with extra glasses, earplugs, gloves, and mask replacements. Take time to regularly inspect equipment for wear and tear, and replace damaged gear immediately. Investing in good, readily available PPE is always cheaper than a trip to the emergency room or lost project days.
Drill Bit Selection Guide for Brick, Concrete, and Steel
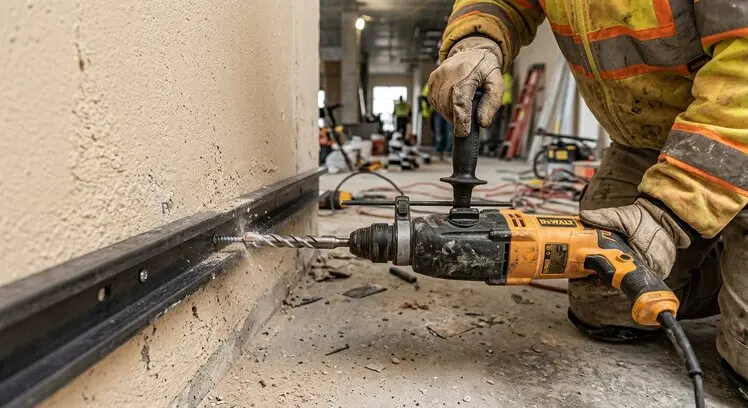
Choosing the wrong drill bit for a job can ruin your material, dull your bit in seconds, or even damage your power tools. Whether you are anchoring brackets into a brick wall, boring holes through reinforced concrete, or drilling clean holes into structural steel, using the correct bit is essential for a fast, clean, and safe finish.
Understanding the differences between standard masonry, SDS, and HSS drill bits ensures you always match the right bit to the right material.
Standard Masonry Bits: Ideal for Brick, Block, and Light Stone
Standard masonry drill bits are designed specifically for drilling into lighter, non-reinforced stone and masonry materials. They feature a durable carbide tip welded onto a steel shank, which works by pulverizing stone as the drill applies pressure and rotation. These bits are typically used in standard rotary power drills or basic hammer drills equipped with a traditional three-jaw chuck.
They excel when working with standard red brick, cinder block, mortar, soft stone, and plaster. When using standard masonry bits, applying moderate, steady pressure while running the hammer function on your drill helps chip away the material efficiently without overheating the bit.
SDS Bits: Built for Reinforced Concrete and Heavy Demolition
SDS (Slotted Drive System) drill bits are engineered for high-impact, heavy-duty drilling into tough, dense materials like concrete and stone. Unlike standard smooth-shank bits, SDS bits feature specially grooved shanks that snap securely into an SDS rotary hammer drill. This slotted design allows the bit to slide back and forth like a piston, delivering maximum hammer action directly into the material without slipping in the chuck.
These bits are essential for reinforced concrete, natural stone, hard brick, and heavy masonry structures where standard bits fail. Their heavy-duty carbide tips and reinforced fluting quickly clear out pulverized dust, allowing you to bore large-diameter or deep anchor holes effortless and with minimal physical effort.
HSS Bits: The Go-To for Steel, Metals, and Hard Plastics
HSS (High-Speed Steel) bits are specifically engineered to cut through metal, wood, and hard plastics rather than pulverize stone. Made from fully hardened carbon steel, HSS bits have sharp, angled cutting edges that shave away material in long spirals. Variants like Cobalt HSS or Titanium-coated HSS are designed to handle high frictional heat when drilling through tougher metals like stainless steel or thick angle iron.
Use HSS bits whenever your job involves structural steel, sheet metal, aluminum, copper, wood, or dense plastics. When drilling through metals, run your drill at a lower speed with firm, constant pressure, and consider applying cutting fluid to prevent heat buildup and keep the bit sharp longer.
Quick Reference: Matching Your Bit to the Job
Selecting the right bit comes down to knowing your material density and drill mechanism. For soft-to-medium masonry like brick, mortar, or lightweight concrete block, reach for a standard masonry bit paired with a regular drill.
When tackling heavy concrete slabs, foundation walls, or stone masonry, rely on an SDS bit mounted inside a dedicated rotary hammer drill. For any metalwork, structural framing, or sheet metal assembly, an HSS bit is the necessary choice to cut clean, precise holes without damaging the metal.
Choosing the wrong drill bit for a job can ruin your material, dull your bit in seconds, or even damage your power tools. Whether you are anchoring brackets into a brick wall, boring holes through reinforced concrete, or drilling clean holes into structural steel, using the correct bit is essential for a fast, clean, and safe finish.
Understanding the differences between standard masonry, SDS, and HSS drill bits ensures you always match the right bit to the right material.
Standard Masonry Bits: Ideal for Brick, Block, and Light Stone
Standard masonry drill bits are designed specifically for drilling into lighter, non-reinforced stone and masonry materials. They feature a durable carbide tip welded onto a steel shank, which works by pulverizing stone as the drill applies pressure and rotation. These bits are typically used in standard rotary power drills or basic hammer drills equipped with a traditional three-jaw chuck.
They excel when working with standard red brick, cinder block, mortar, soft stone, and plaster. When using standard masonry bits, applying moderate, steady pressure while running the hammer function on your drill helps chip away the material efficiently without overheating the bit.
SDS Bits: Built for Reinforced Concrete and Heavy Demolition
SDS (Slotted Drive System) drill bits are engineered for high-impact, heavy-duty drilling into tough, dense materials like concrete and stone. Unlike standard smooth-shank bits, SDS bits feature specially grooved shanks that snap securely into an SDS rotary hammer drill. This slotted design allows the bit to slide back and forth like a piston, delivering maximum hammer action directly into the material without slipping in the chuck.
These bits are essential for reinforced concrete, natural stone, hard brick, and heavy masonry structures where standard bits fail. Their heavy-duty carbide tips and reinforced fluting quickly clear out pulverized dust, allowing you to bore large-diameter or deep anchor holes effortless and with minimal physical effort.
HSS Bits: The Go-To for Steel, Metals, and Hard Plastics
HSS (High-Speed Steel) bits are specifically engineered to cut through metal, wood, and hard plastics rather than pulverize stone. Made from fully hardened carbon steel, HSS bits have sharp, angled cutting edges that shave away material in long spirals. Variants like Cobalt HSS or Titanium-coated HSS are designed to handle high frictional heat when drilling through tougher metals like stainless steel or thick angle iron.
Use HSS bits whenever your job involves structural steel, sheet metal, aluminum, copper, wood, or dense plastics. When drilling through metals, run your drill at a lower speed with firm, constant pressure, and consider applying cutting fluid to prevent heat buildup and keep the bit sharp longer.
Quick Reference: Matching Your Bit to the Job
Selecting the right bit comes down to knowing your material density and drill mechanism. For soft-to-medium masonry like brick, mortar, or lightweight concrete block, reach for a standard masonry bit paired with a regular drill.
When tackling heavy concrete slabs, foundation walls, or stone masonry, rely on an SDS bit mounted inside a dedicated rotary hammer drill. For any metalwork, structural framing, or sheet metal assembly, an HSS bit is the necessary choice to cut clean, precise holes without damaging the metal.